Friday, June 25, 2010

chex mix

Recipe: Chex Mix


One of the musicmaker's coworkers passed this on after bringing it to the company rafting trip a couple weeks ago. She said it was a weight watchers recipe, not that it tastes health conscious at all. We were instantly addicted and I've made a batch every week since I've gotten the recipe.

What you Need
4 cups Corn Chex or Crispix
3 cups Pretzels
3 cups Honey Teddy Grahams
1/2 cup pecan pieces
Cooking Spray
3/4 cup firmly packed light brown sugar
6 TBSP light corn syrup (Karos)
3 TBSP stick butter
1 tsp vanilla extract
1/4 tsp salt

The Steps
  • Preheat oven to 250
  • Line a jelly roll pan with foil and spray it with pam. Combine first 4 ingredient on the pan. I found it was easier too leave it mounded (not spread out) for the next step.
  • Combine brown sugar, corn syrup, and butter in a small saucepan; cook over medium heat 2 minutes or until sugar and butter melt, stirring constantly. You don't want to cook it so long that it thickens because then it's harder to coat all the pieces. Remove from heat; stir in vanilla and salt. Immediately pour syrup mixture evenly over cereal mixture, tossing quickly to coat well.
  • 4. Bake at 250 for 1 hour, stirring every 15 minutes. Spread warm snack mix in a single layer on wax paper (we used parchment paper) to cool. Break cooled snack mix apart. Store in an airtight container.

Wednesday, June 23, 2010

choc marshmallow pillows

Chocolate Marshmallow Pillows

Cookies

1

pouch (1 lb 1.5 oz) double chocolate chunk cookie mix

1/4

cup vegetable oil

2

tablespoons water

1

egg

2/3

cup chopped pecans

12

large marshmallows, cut in half

Frosting

1

cup semisweet chocolate chips (6 oz)

1/3

cup whipping cream

1

teaspoon butter or margarine

1

teaspoon vanilla

1/2

cup powdered sugar


Heat oven to 350°F. In large bowl, stir cookie mix, oil, water, egg and pecans until soft dough forms.


On ungreased cookie sheets, drop dough by rounded tablespoonfuls 2 inches apart.


Bake 7 minutes. Remove from oven; immediately press marshmallow half lightly, cut side down, on top of cookie. Bake 1 to 2 minutes longer or just until marshmallows begin to soften. Cool 2 minutes; remove from cookie sheets to cooling racks. Cool completely, about 15 minutes.


Meanwhile, in 1-quart nonstick saucepan, melt chocolate chips over low heat, stirring until smooth. Remove from heat. Add whipping cream, butter and vanilla; blend well. Stir in powdered sugar until smooth.


Spread frosting over each cooled cookie, covering marshmallow. Let stand until frosting is set.


From Betty Crocker

Saturday, June 19, 2010

Blackberry Muffins

Blackberry Muffin Recipe

  • 1 sticks butter or margarine, melted (1/2 cup)
  • 1 cup whole milk
  • 2 large eggs
  • 2 teaspoons vanilla or 1 teaspoon strawberry extract
  • 1 cup sugar
  • 3 cups all purpose flour
  • 1 1/2 Tablespoons baking powder
  • 1/2 teaspoon nutmeg, ground
  • 1/2 teaspoon salt
  • 3 cups fresh or frozen blackberries

Brown Sugar Streusel Topping Recipe

  • 1/3 cup brown sugar
  • 1/3 cup flour
  • 2 Tbsp butter, softened
  • 1/2 tsp nutmeg or cinnamon to taste

How To Bake Blackberry Muffins

  1. Preheat oven to 350 degrees F.
  2. Spray non-stick muffins pans or use paper cupcake liners.
  3. In a large bowl, combine flour, baking powder, nutmeg and salt. Set aside.
  4. Mix all streusel topping ingredients together in a small bowl and set aside.
  5. Melt butter and set aside to cool slightly.
  6. Whisk together milk, eggs and vanilla or strawberry extract in a large mixing bowl.
  7. Add sugar to the milk mixture and beat or whisk well.
  8. Add melted butter and mix again.
  9. With a plastic spatula or wooden spoon, fold dry ingredients into wet ingredients and mix only until moistened and blended. Do not over mix batter.
  10. Fold fresh or frozen blackberries into batter.
  11. Scoop muffin batter 3/4 full into prepared pans.
  12. Sprinkle a little streusel topping on each muffin top.
  13. Bake at 350 degrees for approximately 25-30 minutes or until muffin tops spring back when touched.
  14. Wait 5 minutes until the muffins can be handled, then carefully remove to a wire cooling rack.
  15. Let blackberry muffins cool completely before storing in air tight containers. Freeze muffins for up to 3 months.
  16. Makes 15 regular size muffins. Recipe can be doubled with good success.

Blackberry and Oatmeal breakfast cake

Blackberry & Oatmeal Breakfast Cake
Recipe by Food Blogga. Serves 6-8.
Ingredients:

½ cup whole wheat flour
½ cup all-purpose flour
1 ½ teaspoon baking powder
½ teaspoon baking soda
½ teaspoon salt
½ teaspoon ground cinnamon
¼ teaspoon ground nutmeg
½ cup brown sugar
½ cup granulated sugar
2 eggs
1 ½ teaspoons pure vanilla extract
1 cup buttermilk
3 tablespoons canola oil
1 cup rolled oats
¾ cup fresh blackberries (cut in half if very large)
¼ cup chopped macadamia nuts
3 tablespoons chopped macadamia nuts, for topping
3 tablespoon rolled oats, for topping
Method:
1. Place rack in centre of oven and preheat to 180’C.
2. Grease an 8 inch square pan.
3. In a medium bowl, sift the flours.
4. Add baking powder, baking soda, salt, cinnamon and nutmeg.
5. In a separate large bowl, beat the sugars and eggs at medium speed until light.
6. Beat in the vanilla, buttermilk and oil.
7. Reduce speed to low and add dry ingredients, including the oats.
8. Beat until just incorporated and the flour is combined.
9. Using a rubber spatula, fold in the blackberries and cashews until well blended.
10. Pour the batter into the pan and gently shake it to even it out.
11. Sprinkle the chopped cashews and oats evenly over the top of the cake and lightly coat with cooking spray.
12. Bake for 45 - 55 minutes, or until the cake is golden brown and a cake tester inserted deep into the centre comes out clean.
13. Transfer the cake to a rack and cool for 10 minutes.
14. Unmold the cake and place on a rack and allow to set for at least 15 minutes before slicing. Serve with double cream.

Tuesday, June 1, 2010

bbq ribs (EJs ribs)

marthastewart.com

Serves 4

  • 2 1/2 teaspoons mustard powder
  • 2 teaspoons sweet paprika
  • 1 teaspoon celery salt
  • 1 teaspoon onion powder
  • 3/4 teaspoon red-pepper flakes
  • 1/2 teaspoon garlic powder
  • 1/4 teaspoon celery seed
  • Coarse salt
  • 2 slabs baby back ribs (about 2 pounds total)
  • Vegetable oil, for grates
  • Emeril's Rib Sauce

Directions

  1. In a small bowl, combine mustard powder, paprika, celery salt, onion powder, red-pepper flakes, garlic powder, celery seed, and 1 teaspoon salt. Rub slabs on both sides with the spice mixture, and refrigerate, loosely covered, for 2 hours.
  2. Preheat oven to 300 degrees. Stack slabs on a double layer of aluminum foil; tightly wrap. Place on a rack on a baking sheet. Cook until meat pulls away from the bone and is easily pierced with the tip of a sharp knife, 1 to 1 1/2 hours.
  3. Heat grill to medium-high; lightly oil grates. Carefully remove ribs from foil, pouring off any liquid. Brush generously on both sides with rib sauce; grill ribs until sauce begins to bubble and brown around the edges, 4 to 5 minutes per side. Serve ribs with any leftover sauce, if desired.

pinto bean burritos

marthastewart.com

Serves 8

  • 3/4 cup rice (brown or white)
  • 2 tablespoons olive oil
  • 2 medium onions, chopped
  • 4 garlic cloves, chopped
  • 1 jalapeno chile, chopped (ribs and seeds removed, for less heat)
  • 1/2 teaspoon ground cumin
  • Coarse salt and ground pepper
  • 3 tablespoons tomato paste
  • 3 cans (15 ounces each) pinto beans, drained and rinsed
  • 1 bag frozen corn kernels, (10 ounces)
  • 6 scallions, thinly sliced
  • 8 burrito-size flour tortillas, 10 inches each
  • 2 cups (8 ounces) shredded Monterey Jack cheese
  • Salsa and sour cream, optional

Directions

  1. Cook rice according to package instructions; set aside.
  2. Meanwhile, heat oil in a large saucepan over medium. Add onions, garlic, jalapeno, and cumin; season with salt and pepper. Cook, stirring occasionally, until golden, 10 to 12 minutes. Add tomato paste, and cook, stirring, 1 minute.
  3. Add beans and 1 1/2 cups water; bring to a boil, reduce heat to medium, and simmer, stirring occasionally, until thickened, 10 to 12 minutes. Add corn; cook to heat through, 2 to 3 minutes. Remove from heat; stir in scallions.
  4. Heat tortillas according to package instructions; fill with rice, bean mixture, and cheese.
  5. Assemble: Mound 1/4 cup rice, 3/4 cup bean mixture, and 1/4 cup cheese on one side of tortilla. Fold, and hold in sides. Starting from filled end, holding sides in as you work, tightly roll into a bundle. Place on a baking sheet, seam side down, and prepare remaining burritos.
  6. Serve immediately, with salsa and sour cream, if using, or wrap individually in plastic and freeze up to 3 months.

Friday, May 28, 2010

sweet chex mix

sweet chex mix


I love Chex mix. Pretty much every kind of it. But this sweet Chex mix that my mom has made ever since I was a kid is my absolute favorite kind. I won't pretend that it is healthy in any way, but that's why it's delicious! When you need a sweet, gooey, treat run to the nearest store and grab the ingredients for this recipe. It could be the hit of your Memorial Day BBQ!

Sweet Chex Mix
Place in large bowl:
1 (16 oz) box of corn Chex
1 can of peanuts, lightly salted (I usually go light on the peanuts for my husband's preference, so use whatever amount suits you.)

Melt 2 cups of butter or margarine in a pan. Add:
1 1/2 cups corn syrup
1 1/2 cups sugar
1 tsp. vanilla
--Bring to a boil. Boil for 1-2 minutes. Pour over cereal and peanuts. Stir and pour out onto wax paper. Let sit for a couple of hours and then store in an airtight container.

Wednesday, May 26, 2010

fondant

Make-a-Cake Series: Making and Coloring Fondant


Have you seen the winner of the Lily Lane giveaway? Scroll down or click here.

And have you seen my newest sponsor Thirty-One found here? You are going to quickly fall in love with all of their purses, bags, baskets, and more. And don't worry, they have sassy, flirty, classy, and stunning..... A style for each of us.

. . . . . . . . . . . . . . . . . . . . . . . . . . . . .


I have had many requests to do a post on how to make fondant.

I am happy to fill that request.

I also added how to color your fondant.


Homemade Marshmallow Fondant vs Traditional Fondant (found in stores):

- Marshmallow fondant tastes better than store bought fondant.
- Marshmallow fondant is cheaper: $4.00 a batch vs. $15-25 for traditional fondant.
- Store bought is, however, a bit easier to work with.


One thing I must start with is that I cannot take credit for this marshmallow fondant recipe or how to make marshmallow fondant.
When I first started cake decorating I looked up how to make marshmallow fondant and found that most of the recipes/process were very similar.

Here is the exact recipe I used.

I added pictures below to show you the steps that I take.
I hope this is helpful, but know that this is not my own information.

Supplies:

If you want to know how much you need to cover your cake, check out the Wilton site.
(This recipe will make about 3 lbs of fondant.)
  1. Two pound bag of powdered sugar **
  2. 16 oz bag of mini marshmallows **
  3. 1/2 cup shorting (Crisco brand)-- put this in a container you can get your fingers into....like the measuring cup shown above.
  4. 2-4 Tablespoons of water
**Don't buy the "off brand" of these products. Trust me, I have tried all different combinations to be able to use the generic brand and it just doesn't work. You will end up frustrated like I was....trust me on this one! Ha!


Let's get started...

Clean your counter really well and spread 1/2 of your shorting in a thick layer on your counter about the size of a basketball.

Sift your powder sugar into a pile on top of the shorting. I hate sifting when I bake but in this case it is really helpful. If you don't do it you will end up with clumps of sugar in your fondant.

Make a crater in the middle of your sugar, keeping high sides all around and a layer of powder sugar on the bottom.


Place your marshmallows in a microwave safe bowl. Add your water. Start with 2 tablespoons.

**The amount of water you use will depend on where you live. When I lived in southeastern Idaho (where it's more dry) I would add 3 1/2 tablespoons but now that I am in northern Idaho, I only add 2.
If your fondant is dry (cracking) when you knead it later on, you know you need to add more water. Once you figure out how much you need you can add it during this step.

Put your bowl in the microwave. Heat until your marshmallows melt. This takes about 2 1/2-4 minutes. They will look like this:


Fold the marshmallows until it is all incorporated and smooth.


Pour your mixture onto your powdered sugar crater, making sure to scrape and add the excess from the sides of the bowl.

These next steps can be hot, please be careful.
You can let the marshmallows cool a bit if needed.


Coat your hands with shortening. On the front, back, in between fingers, up to your wrists, everywhere. Ha! That which it's not coated will have fondant stuck to it. So take off your rings too.

And I am sure there are many ways to do this.....but this is what works for me.
Start to fold the powdered sugar on top of the marshmallows....


...and keep folding and combining it until it all starts mixing together.


It will start to look like this.


Now I scrape the counter with a pastry scraper or spatula, put the extra sugar on the fondant.
Apply a thin layer of shortening onto the counter to prevent sticking and keep kneading the fondant.


Keep going until everything is worked in and smooth. If it doesn't get smooth right away just keep kneading.
** If you still have some shortening left, work all but 1 tablespoon in.


Now you're done.
Use the fondant right away or coat your finished fondant with a thin layer of shortening and seal tight in a zip lock bag.

This can be left out for a few days without a problem or for several weeks in the refrigerator.

Keep in mind that making your fondant ahead of time is a real timer saver.

......................................................................


Onto coloring your fondant.
Fondant is available at the stores already colored or in white.

When you color it yourself there are benefits:
  • it's cheaper
  • you have many more color options
  • you can match any shade you want.


To color your fondant, you will need:
- White fondant
- Gel paste dye -- I have used the Wilton brand available at Michael's and I like it. Now I use AmeriColor gel paste only because I like the squeeze bottle. I buy that brand from Amazon.com.
- Food safe gloves (optional)-- the food color will stain your hands for a day if you do not wear gloves.


For this batch I needed an aqua color for a cake I was making. I knew I needed a mix of teal and sky blue.
It's best to use a small amount of color at first and get darker of you need.

First, warm up your fondant in the microwave (just a little) to make it easier to knead.

Then, add a few drops of color to a few different areas of the fondant. This will help it mix in faster.

**Note--if you are coloring your fondant a dark color, like red or black, plan on using a lot of dye. It takes large amounts to get true dark colors.


Knead the fondant until all the color is mixed in. Make sure there are no streaks.


After I mixed in the color, I still needed my fondant to be a shade darker.


So, I added a few more drops of color at a time and kneaded again. Perfect.

And that's it.

Now you're ready to make beautiful edible creations!


Wondering how to use your new fondant?
If you haven't already, make sure and check out the cake preparation tutorial here and the covering your cake with fondant tutorial here.


I hope these steps will make you even more brave to jump into fondant work.
Happy Decorating!

black bean burgers

Friday, March 5, 2010

Homemade Black Bean Burgers Recipe


I'm a sucker for a burger and fries. There, I admitted it.

But I'm also trying to be healthy (or at least, healthier) so I've started collecting recipes for ways to bridge both desires. Here's a recipe for a homemade black bean burger (which I've scaled down to only two servings) that has become a regular in our recipe line-up.

Black Bean Burgers (serves 2)
Ingredients
1/2 cup dried black beans (or about half a can of black beans, rinsed and drained)
1/4 cup dry breadcrumbs
1/8 cup minced red onion
1/4 tsp. dried oregano
1/8 tsp. ground cumin
dash of black pepper
1/2 large egg (I usually just refrigerate the other half to make for breakfast the next morning; according to the USDA, make sure to "Use leftover yolks and whites within 4 days.")

Directions
If using dried black beans, be sure to soak and boil the them first for the appropriate amount of time.
Once that's done or if you're using canned black beans, place beans in a large bowl and mash with a fork or put in a food processor to chop them down (I find that easiest).
Stir in the rest of the ingredients and mix well.
Divide the mixture into two patties and then grill on skillet/frying pan for about 5 minutes each side.

You're done. Seriously. Throw on a hamburger bun, top with guacamole or salsa or whatever toppings you like, and enjoy! (I like to serve them up with a side of sweet potatoes. I really can not get enough of those little tubers!)

Wednesday, May 19, 2010

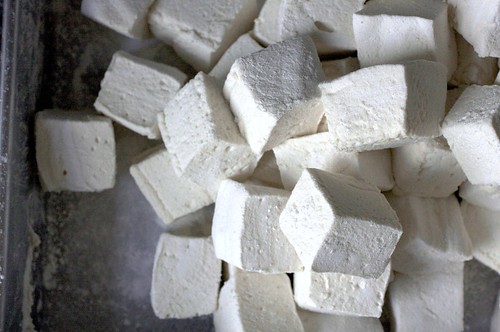
fluffy marshmallows

springy, fluffy marshmallows

bouncy marshmallows

The first time I made marshmallows, well, I don’t think saying “it was a mess” adequately describes it. Oh, the marshmallows were successful; they even looked and tasted like marshmallows, but yours truly? I ended up in a tangled web of marshmallow strings.
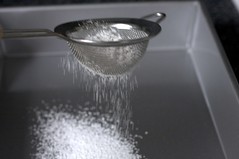
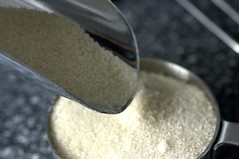
powdering the oiled panso much gelatincane sugarcorn syrup

It all went south when I couldn’t resist the urge to scrape down the paddle and bowl (anyone else an obsessive bowl scraper? I cringe when things go to waste). The paddle was gunked to the bowl and the scraper was glued to the paddle and then — and it is my duty to implore you not to do this at home — you think, “well, I’ll just wipe off the paddle with my index finger” and then your index finger gets knit to the scraper and then you think “well, let me use my other finger to wipe this one off” and all of a sudden, you’ve got strands of marshmallow strung from each finger to the bowl, the mixer, the paddle, the scraper, each corner of the pan, your shirt, the floor and then your husband comes home just as you’re pleading “help! I’m all knotted up!” and he instead gets the camera.

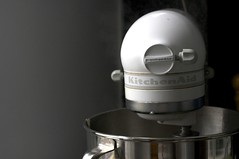
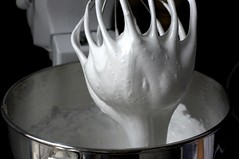
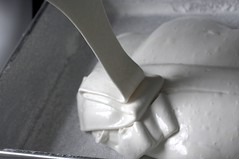
boiling the sugarsteaming and whippingwhipping the marshmallowmmmarshmallowpouring the marshmallowpouring the marshmallows

Needless to say, it’s taken me some time to tackle marshmallows again. It wasn’t just the mess, however — though, admittedly, it was mostly the mess deterring me, despite the fact that it all dissolves easily and residue-free when rinsed with warm soapy water — it was the fact that the marshmallows ended up a little denser than that Jet-Puffed ones we’re all used to. And nobody likes a dense, chewy marshmallow. Especially after all of that aforementioned drama.

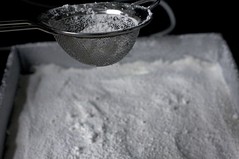
spreading the marshmallowsdusting the tops of the marshmallowspeeling the marshmallow from the panfluffy, sproingy marshmallows

But then I had to go make homemade graham crackers a couple weeks ago and you can’t make graham crackers without making s’mores (you just cant; it’s a summer sacrilege) and there was I was, overdue to face down my marshmallow demons. First order: A new recipe. I looked at what everyone else out there is making, and the recipes were largely the same until I found this ancient one (like, 11 years old, omg) on Epicurious that had the curious addition of egg whites (which is honestly something, prior to making marshmallows the first time, I’d always assumed every marshmallow recipe contained, given their flavor parallels to meringue) and the promise of extra lift and fluffiness within. Second order: Preparing for a mess. Except this time — and I’m not sure if it was the extra fluffy and more movable marshmallow “batter” or just my experience warning me to not touch it but it ended up being oh-so-less dramatic. Well, the cooking part at least: I woke up today with dried marshmallow in my hair; I’d say last night’s s’mores on the grill were a success.
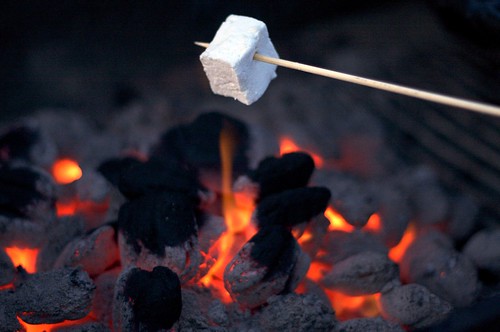
marshmallow, toasting

Springy, Fluffy Marshmallows
Adapted from Gourmet, December 1998

These homemade marshmallows are not only easy to make, they set as perfectly as promised: puffed and lightweight, bouncing off one another as I tossed them in the container. Even better, they toasted like a campfire charm speared on the end of a skewer, and s’mooshed between two graham crackers with a square of chocolate.

Makes about 96 1-inch cubed marshmallows

About 1 cup confectioners’ sugar
3 1/2 envelopes (2 tablespoons plus 2 1/2 teaspoons) unflavored gelatin
1 cup cold water, divided
2 cups granulated sugar (cane sugar worked just fine)
1/2 cup light corn syrup
1/4 teaspoon salt
2 large egg whites or reconstituted powdered egg whites
1 tablespoon vanilla (alternately: 1/2 of a scraped vanilla bean, 2 teaspoons almond or mint extract or maybe even some food coloring for tinting)

Oil bottom and sides of a 13- by 9- by 2-inch rectangular metal baking pan and dust bottom and sides with some confectioners’ sugar.

In bowl of a standing electric mixer or in a large bowl sprinkle gelatin over 1/2 cup cold cold water, and let stand to soften.

In a 3-quart heavy saucepan cook granulated sugar, corn syrup, second 1/2 cup of cold water, and salt over low heat, stirring with a wooden spoon, until sugar is dissolved. Increase heat to moderate and boil mixture, without stirring, until a candy or digital thermometer registers 240°F, about 12 minutes. Remove pan from heat and pour sugar mixture over gelatin mixture, stirring until gelatin is dissolved.

With standing or a hand-held electric mixer beat mixture on high speed until white, thick, and nearly tripled in volume, about six minutes if using standing mixer or about 10 minutes if using hand-held mixer. (Some reviewers felt this took even longer with a hand mixer, but still eventually whipped up nicely.)

In separate medium bowl with cleaned beaters beat egg whites (or reconstituted powdered whites) until they just hold stiff peaks. Beat whites and vanilla (or your choice of flavoring) into sugar mixture until just combined. Pour mixture into baking pan and don’t fret if you don’t get it all out (learning from my mess of a first round). Sift 1/4 cup confectioners sugar evenly over top. Chill marshmallow, uncovered, until firm, at least three hours, and up to one day.

Run a thin knife around edges of pan and invert pan onto a large cutting board. Lifting up one corner of inverted pan, with fingers loosen marshmallow and ease onto cutting board. With a large knife trim edges of marshmallow and cut marshmallow into roughly one-inch cubes. (An oiled pizza cutter works well here too.) Sift remaining confectioners’ sugar back into your now-empty baking pan, and roll the marshmallows through it, on all six sides, before shaking off the excess and packing them away.

Do ahead: Marshmallows keep in an airtight container at cool room temperature 1 week.

Tuesday, May 18, 2010

martha stewart zuchini bread

Ingredients

Serves 12

  • Nonstick cooking spray
  • 1 large zucchini
  • 1 cup packed light-brown sugar
  • 2 tablespoons granulated sugar
  • 2/3 cup vegetable oil
  • 2 teaspoons vanilla extract
  • 2 large eggs
  • 1 1/2 cups all-purpose flour
  • 1/2 teaspoon baking powder
  • 1/2 teaspoon baking soda
  • 1 1/2 teaspoons ground cinnamon
  • 3/4 teaspoon ground nutmeg
  • 1/4 teaspoon ground ginger
  • 1/8 teaspoon ground cloves
  • 3/4 teaspoon salt

Directions

  1. Preheat oven to 350 degrees. Lightly coat a 9-by-5-by-3-inch loaf pan with cooking spray, and set aside. Grate zucchini on the large holes of a box grater (to yield 1 3/4 cups); set aside. In a large bowl, whisk together sugars, oil, vanilla, and eggs.
  2. Into a small bowl, sift together flour, baking powder, baking soda, cinnamon, nutmeg, ginger, cloves, and salt. Add flour mixture to egg mixture, and stir to combine well. Stir in grated zucchini.
  3. Pour batter into prepared pan, spreading evenly. Bake until a toothpick inserted in center of loaf comes out clean, 45 to 55 minutes. Cool in pan 10 minutes; invert onto a wire rack, then reinvert, top side up. Cool completely before slicing.
pork tenderloin roast

Ingredients

Serves 4

  • 2 pounds carrots, peeled and halved lengthwise if large
  • 1/2 pound shallots, peeled and halved if large
  • 2 tablespoons fresh rosemary leaves
  • 2 tablespoons olive oil
  • Coarse salt and ground pepper
  • 1 1/2 pounds boneless pork loin roast
  • 3/4 cup white wine
  • 2 tablespoons all-purpose flour
  • 2 tablespoons grainy mustard

Directions

  1. Preheat oven to 450 degrees. On a rimmed baking sheet, toss carrots, shallots, and 1 tablespoon rosemary with 1 tablespoon oil; season with salt and pepper. Roast for 10 to 12 minutes.
  2. Meanwhile, season pork with salt and pepper. In a large skillet, heat 1 tablespoon oil over medium. Add pork; cook, turning occasionally, until golden brown on all sides, 10 to 12 minutes. Transfer pork to a plate, and reserve skillet.
  3. Remove baking sheet from oven; push vegetables to sides. Place pork in center; return sheet to oven. Roast, tossing vegetables occasionally, until an instant-read thermometer inserted in thickest part of pork registers 145 degrees, 30 to 40 minutes. Loosely tent pork with foil. Let rest 10 minutes before slicing.
  4. While pork rests, pour off almost all of the fat from skillet. Add wine, and cook over medium-high, scraping up browned bits, until syrupy, 4 to 5 minutes. Add flour, and cook, whisking constantly, 30 seconds. Gradually add 1 cup water, whisking constantly. Add 1 tablespoon rosemary. Bring to a simmer. Remove from heat. Whisk in mustard, and season gravy with salt and pepper. Serve pork with carrots and gravy.

Monday, May 17, 2010

paula deen's zuchinni bread

Ingredients

  • 3 1/4 cups all-purpose flour
  • 1 1/2 teaspoons salt
  • 1 teaspoon ground nutmeg
  • 2 teaspoons baking soda
  • 1 teaspoon ground cinnamon
  • 3 cups sugar
  • 1 cup vegetable oil
  • 4 eggs, beaten
  • 1/3 cup water
  • 2 cups grated zucchini
  • 1 teaspoon lemon juice
  • 1 cup chopped walnuts or pecans

Directions

Preheat oven to 350 degrees F. In a large bowl, combine flour, salt, nutmeg, baking soda, cinnamon and sugar. In a separate bowl, combine oil, eggs, water, zucchini and lemon juice. Mix wet ingredients into dry, add nuts and fold in. Bake in 2 standard loaf pans, sprayed with nonstick spray, for 1 hour, or until a tester comes out clean. Alternately, bake in 5 mini loaf pans for about 45 minutes.
pork tenderloin in crockpot

Ingredients

  • 1 (2 pound) pork tenderloin
  • 1 (1 ounce) envelope dry onion soup mix
  • 1 cup water
  • 3/4 cup red wine
  • 3 tablespoons minced garlic
  • 3 tablespoons soy sauce
  • freshly ground black pepper to taste

Directions

  1. Place pork tenderloin in a slow cooker with the contents of the soup packet. Pour water, wine, and soy sauce over the top, turning the pork to coat. Carefully spread garlic over the pork, leaving as much on top of the roast during cooking as possible. Sprinkle with pepper, cover, and cook on low setting for 4 hours. Serve with cooking liquid on the side as au jus.

Sunday, May 2, 2010

Pudding Cups

Pudding Cups

IMG_9670

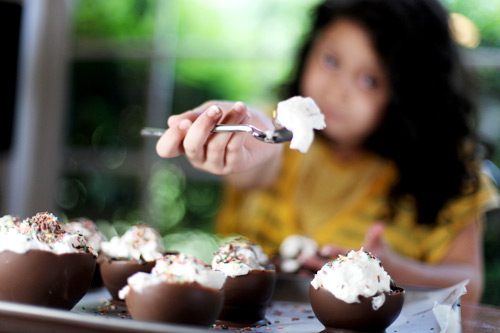
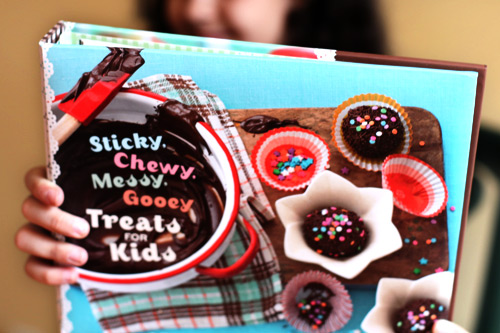
Wicked Good Chocolate Peanut Butter Pudding Cups. They’re from the book, Sticky, Chewy, Messy, Gooey Treats for Kids by Jill O’Connor and just as good as their name states. Jill sent me and my niece a copy of her book as a little thank you for a post I did inspired by her Cheesecake Pops. We had a hard time deciding which recipe to try first, but we kept coming back to these pudding cups. They were really fun to make and and even more fun to eat. You’ll see what I mean in a minute. And the best part… I didn’t have to do any of the work. My little helper did it all.

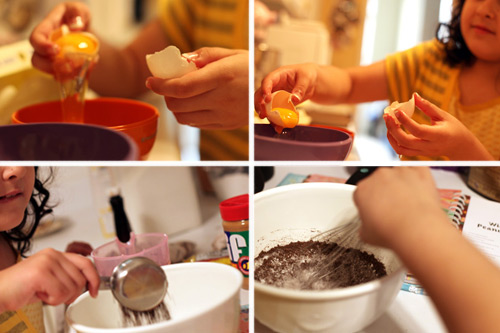
Untitled-2

From separating the egg yolks, to the measuring and mixing.

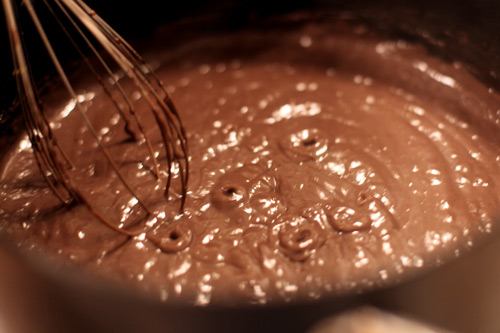
IMG_9039

She cooked the pudding.

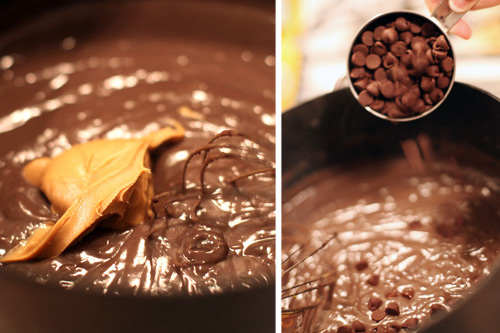
IMG_9044

And mixed in the peanut butter… (thank you, Jill) … and the extra chocolate chips … Oh my!

Let the pudding chill for at least four hours before eating.

Here’s a link to the Pudding Recipe so you can print it out.

Now, here’s the best part.

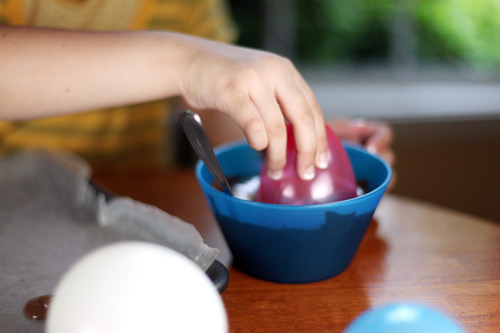
It involves balloons to make bowls.

IMG_9326

Okay, I did help a little bit here. We blew up regular size balloons about halfway so they were still small, but found that water balloons worked best. They are a perfect size for this project, just hard to fill with air instead of water. I about busted a lung.

After you blow up the balloons, wash them off and let them dry. And before you use each one, spray a little non-stick cooking spray on each. Just a little.

Okay, here’s what you do.

Melt some semi-sweet chocolate, white chocolate or confectionery coating. I used the same candy coating I use for cake pops. Let it cool slightly before using. It doesn’t need to be super hot.

IMG_9388

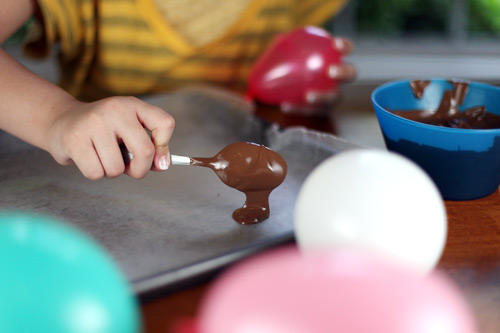
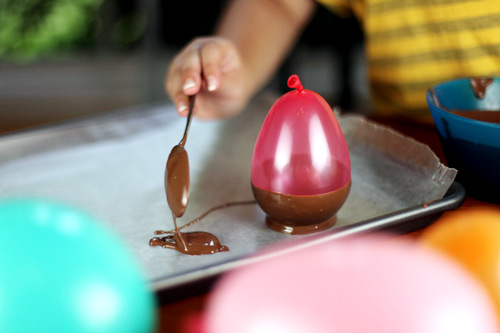
Spoon a small amount on a wax-paper-covered baking sheet.

IMG_9393

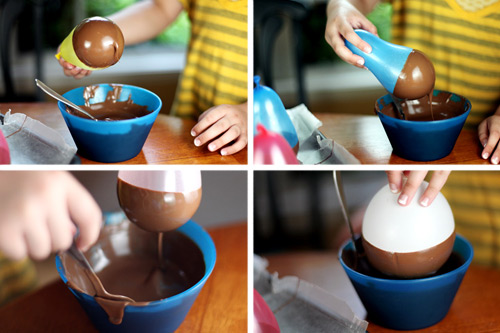
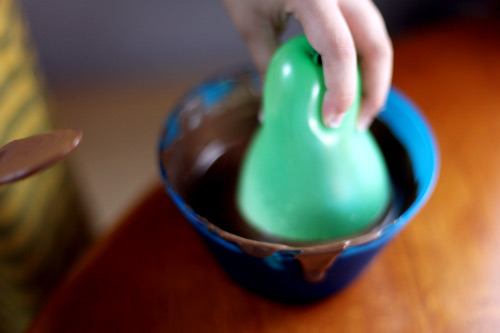
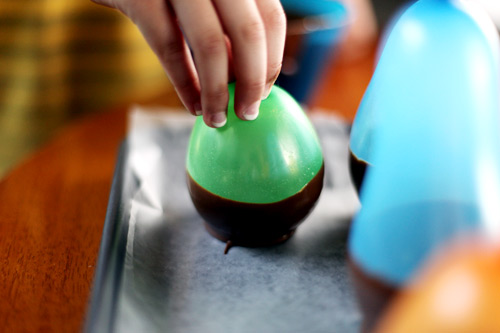
Then take one of your prepared balloons and dip it in the chocolate. Dip it in enough so the chocolate makes a bowl shape around the balloon.

Remove from the chocolate and place the balloon gently on top of the chocolate waiting on the baking sheet.

IMG_9401

And repeat.

Untitled-1

Repeat. Repeat. Repeat.

IMG_9460

It’s as easy as one…

IMG_9461

two…

IMG_9469

three!

IMG_9479

And like I said earlier … just fun.

She was so proud. And so was I.

You can place the tray of balloon bowls in the refrigerator to speed up the drying time.

IMG_9486

Then it’s time for the really fun part.

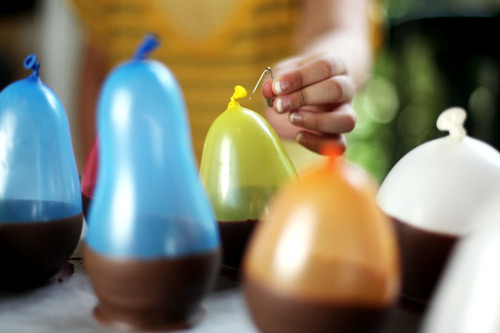
Pop them all with a pin.

IMG_9516_2

Gently remove the balloon carnage from the inside of the cups and they are ready to go. If you want, you can also serve other treats in them like ice cream.

IMG_9540

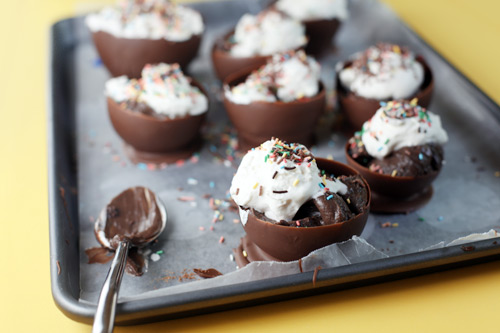
But we had wicked good pudding waiting in the fridge. Fill each cup as full as you want.

IMG_9560

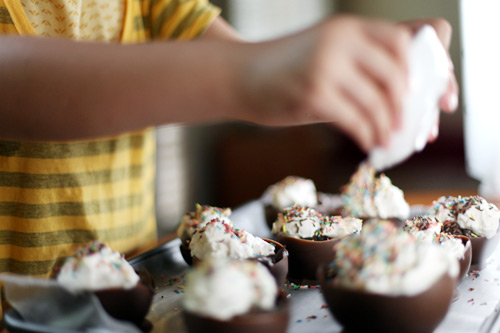
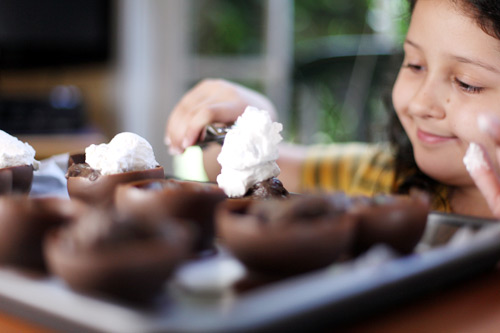
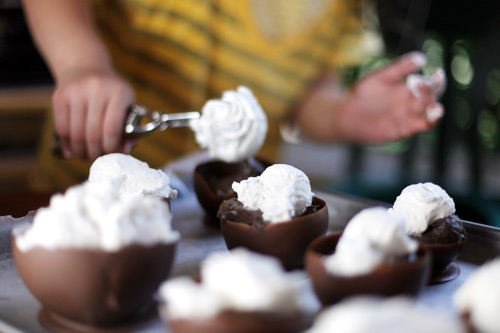
Then you can top them off with whipped cream.

IMG_9573

Lots and lots of whipped cream.

To make Jill’s Sweetened Whipped Cream, just chill a metal bowl and beaters in the freezer for about 15 minutes (to help whip the cream faster). Then combine 2 cups heavy cream, 1/2 cup powdered sugar and 1 teaspoon vanilla. Beat on medium-low using a mixer until the cream starts to thicken. Then increase speed to medium-high and beat until firm peaks form.

And yep, my niece made that too. Tired arms and all.

IMG_9584

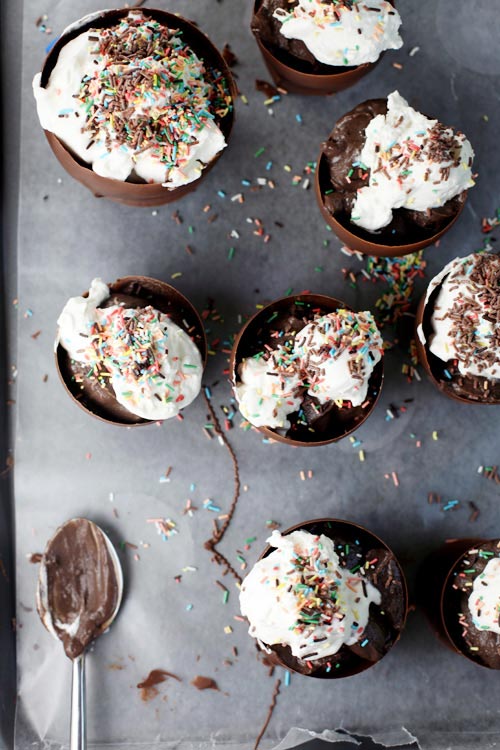
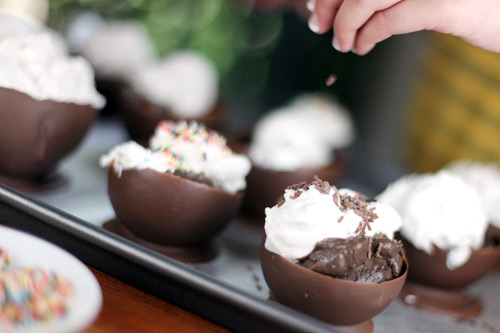
Finally, you can add some sprinkles. As few…

IMG_9603

or as many as you like.

IMG_9619

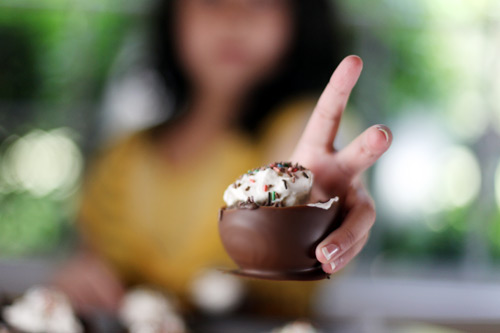
Want some?

IMG_9631

Come on… you know you do.

IMG_9650

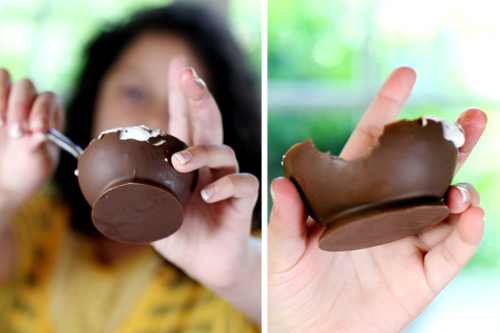
And when you’re all finished, you can eat the bowl, too.

IMG_9691

Enjoy making a mess!

IMG_6944

And, check out Jill’s book. I think you’ll be glad you did.

Sticky, Chewy, Messy, Gooey Treats for Kids

and the original…

Sticky, Chewy, Messy, Gooey

Here’s a link to the Pudding Recipe so you can print it out.